Tapestry Frame Loom
Michael Crompton
This is the “High Warp” tapestry frame loom I designed and have been using for over thirty years. It offers simplicity of construction yet is capable of coping with the demands of a continuous warping technique, tension control and finger shedding. There is no limit to the dimensions of the weaving frame but care must be taken over the size of the accompanying stand and it must be stable.

Tapestry Frame Loom
The following instructions and explanations need to be read carefully before proceeding to construction. I would recommend a high quality soft wood, i.e. Spruce or a Hardwood. Either should be straight, well-seasoned and straight grained to avoid any warping or twisting. Purchase wood which is PAR, Prepared and Ready, i.e. both squared and planed to a final finish. This will help as the “squaring” of wood and planning requires some skill.
I would recommend making the loom no smaller than 180 cms x110cms. There is some natural wastage at both the top and bottom of the warp to allow for a base stick and at the top to allow for “finger shedding”.
The basic cutting list you will need is as follows:
If you are making a larger frame increase the dimensions of the wood
2 Side pieces 2 x 180cms x 3cms x 8cms
4 Blocks 10cms each to support the side pieces 1 x 50cms x 3cms x 8cms
2 Cross Beams (Top and Bottom) 2 x 110cms x 3cms x 8 cms
1 Shed stick and 1 Base Stick 2 x 110cms x 1cms x 4cms
4 Bolts with Nuts, Washers approx. 1cms in Diameter
Depending on the frame size and weaving width you will need 4 fluted Beech Dowels per inch.
With a frame size of 110cms = weaving width of 37 inches you will require approx. 150 for both the top and bottom beam.
A total of approx. 300 dowels 5mm in diameter, fluted and 3cms in length.
Screws of appropriate size to fix blocks to support the two beams.
There is no joints in the construction but take care to ensure the blocks, beams and side pieces are square.
Start by fastening the blocks in position near the top and bottom of the side piece. Use a good wood glue and at least two screws. These blocks will have to take the strain of the warp tension.
Next you will need to mark out the Cross Beams, top and bottom. The aim is to have four dowel pegs to the inch, this will give you the option of 2, 4, 6, 8, or more warp ends per inch. I use 6 ends with two and three ply rug yarns. These settings are achieved by doubling over or missing out dowel pegs. It is a good idea to place the top and bottom bar together during the marking out process and mark them together. This will ensure that they match each other. Once marked, see illustrated drawing, using the correct size drill for the dowels make the holes. With the right drill a tight fit can be achieved with no need for gluing. The holes should be drilled with a slight upward angle slanted to stop the warp ends slipping off. Do not drill the holes too deep, and set the depth on the drill to keep them all the same. I find a drill stand with adjustable bed ideal for this procedure.
Assemble the frame with clamps and mark and drill the holes for the bolts. Insert the bolts and tighten making sure it is square.
Next you must consider the stand for the loom. A stand is not necessary if you have a suitable beam or similar structure in your studio. But it must be positioned vertically and be very rigid. I like the stands as they allow me to move the whole loom around for ease of access to the rear and for storage.
The Loom Stand.
You may use the same kind of wood as for the frame but I tend to go for a soft wood of a heavier dimension.
Cutting List for Stand.
Uprights. 2 pieces of 100cms x 5cms x 10cms
Base sections. 2 pieces of 90cms x 5cms x 10cms
4 Blocks of 15cms each to support the base sections 1 piece of 60cms x 5cms x10cms
4 nuts, washers and bolts approx. 1 cm in Diameter
Start by making a Mortice and Tenon joint to secure the uprights in the centre of the bases. Plant on the blocks to lift the frame slightly off the floor using appropriate size screws and glue. Assemble each of the two frames which must be square and vertical, finally glue and screw for a good rigid and tight fit. If you are making a larger frame increase the dimensions.
All the wood needs a waxed finished, wood needs feeding and it will help prevent staining.
Using clamps assemble the loom and the stand and mark out appropriate positions for the nuts and bolts. These holes must be drilled through both the loom side pieces and the stand uprights. Drill pilot holes before taking apart for drilling the full size bolt holes. With the height of the centre strut you can make further holes to adjust the height of the frame. This is useful during weaving.
But make sure always that the whole loom is square.
You will also need a SHED stick, this must be the same width as the loom and approximate 3cms x 1cms. When twisted on to its side it will give you the natural shed, the opposite shed will be made by using your fingers. I use tapestry bobbins to hold the yarn and which pass easily through the finger shed. Lightly sand the edges and end then drill a hole to take a cord or string at 4cms from each end. This will need to be threaded between alternate warp threads and secured in position by the cord. Loop it over the top and allow for it to hang three quarters of the way down the loom. By twisting it you will wind on the cord and move the stick upwards.
Using the same size of wood, 3cms x 1cm, prepare a piece the same width which will also need holes at either end and is placed between warp threads and screwed into the bottom blocks. This will give you a firm base on which to weave.
2 pieces of 110cms x 3cms x 1 cm. One for the Shed stick and one for the Base stick.
There are alternatives which may be used in the construction depending on the skill and experience of a wood worker, cabinet maker etc. These are equally valid but keep the design simple.

Do contact me if you need any further clarification. I will do my best to assist you.
Michael Crompton. Tapestry Weaver.
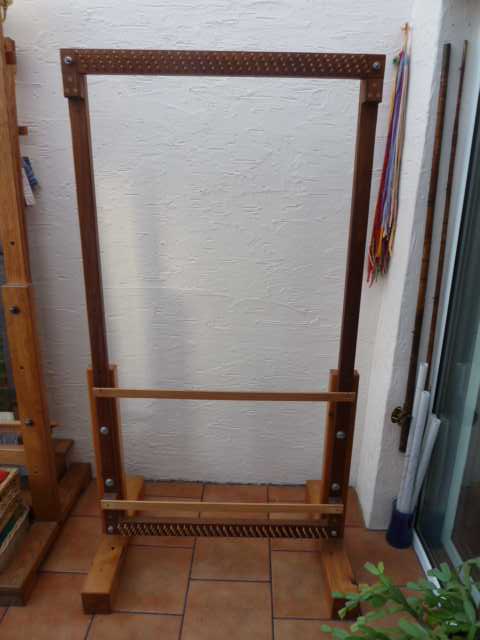
Full Loom
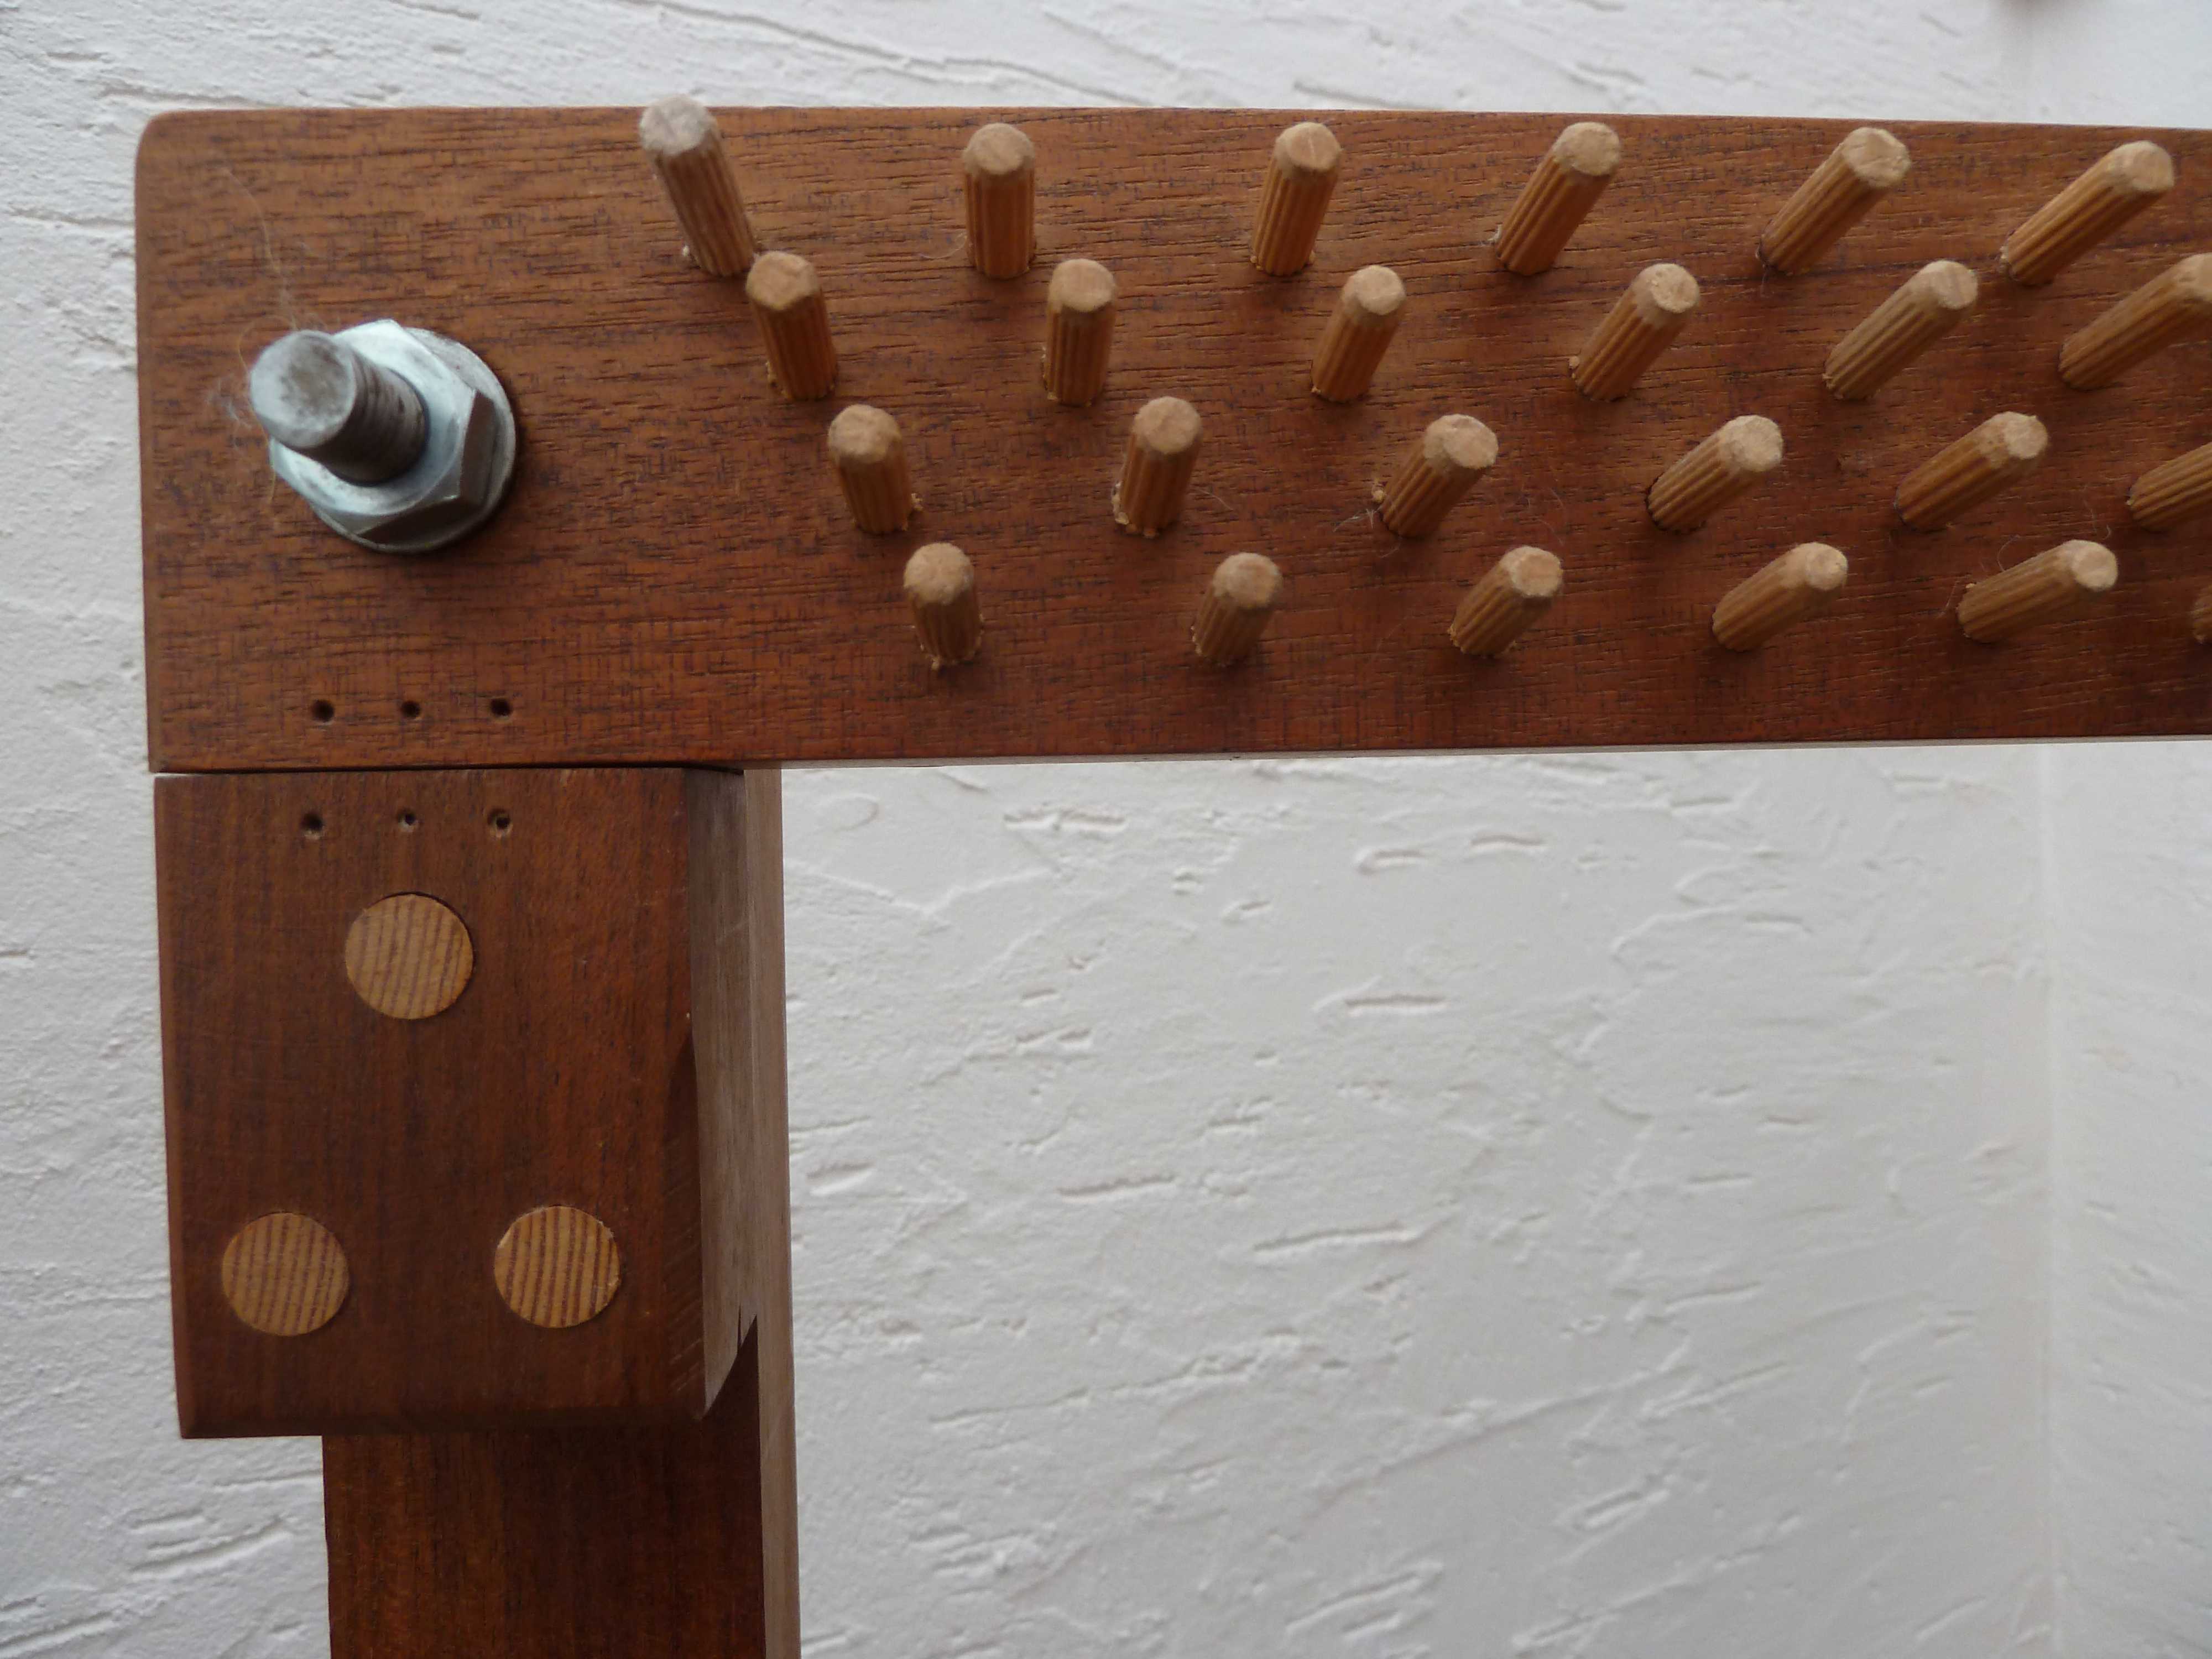
Top Beam 1

Top Threading

Bottom Corner
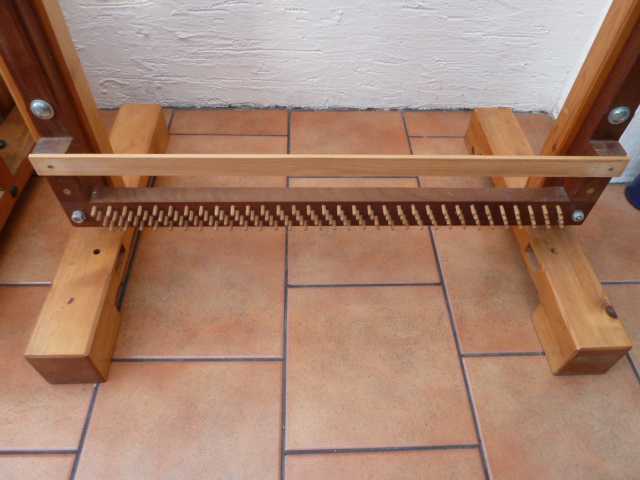
Bottom Support
Warping a Tapestry Frame